Sunday, January 6, 2013

World's Best Quiche

A couple of weeks ago Ethan was reading a book that mentioned quiche.  He asked me what it was and when I told him, he started begging me to make it.  I came across a new recipe that I wanted to try and it turned out to be AMAZING.  I made it for breakfast one Saturday and our whole family devoured it!

World's Best {and easiest} Quiche

2 shallow pie crusts or 1 deep dish pie crust, unbaked
5 eggs
 1 1/2 C half and half
2 C shredded cheese ( I used colby-jack, which is our favorite)
3 Tbsp flour
9 pieces cooked bacon, crumbled (I always have Costco pre-cooked on hand)
1 green onion bunch, diced

Mix everything together and pour into the pie crust.  It will fill two shallow crusts perfectly, or one deep dish with a little bit remaining.  Don't fill the crust all the way to the top because the eggs will slightly expand when cooking.

The recipe doesn't call for it, but I sprinkled it with a little bit of dill weed on top for extra flavor.  So good!

Wrap the pie edges in foil so they don't burn, and bake at 350 for 60-70 minutes.  Let set for about 10 minutes before cutting into it.  It'll be gone in a few minutes!

Friday, January 4, 2013

How To Fix a Drawer Face

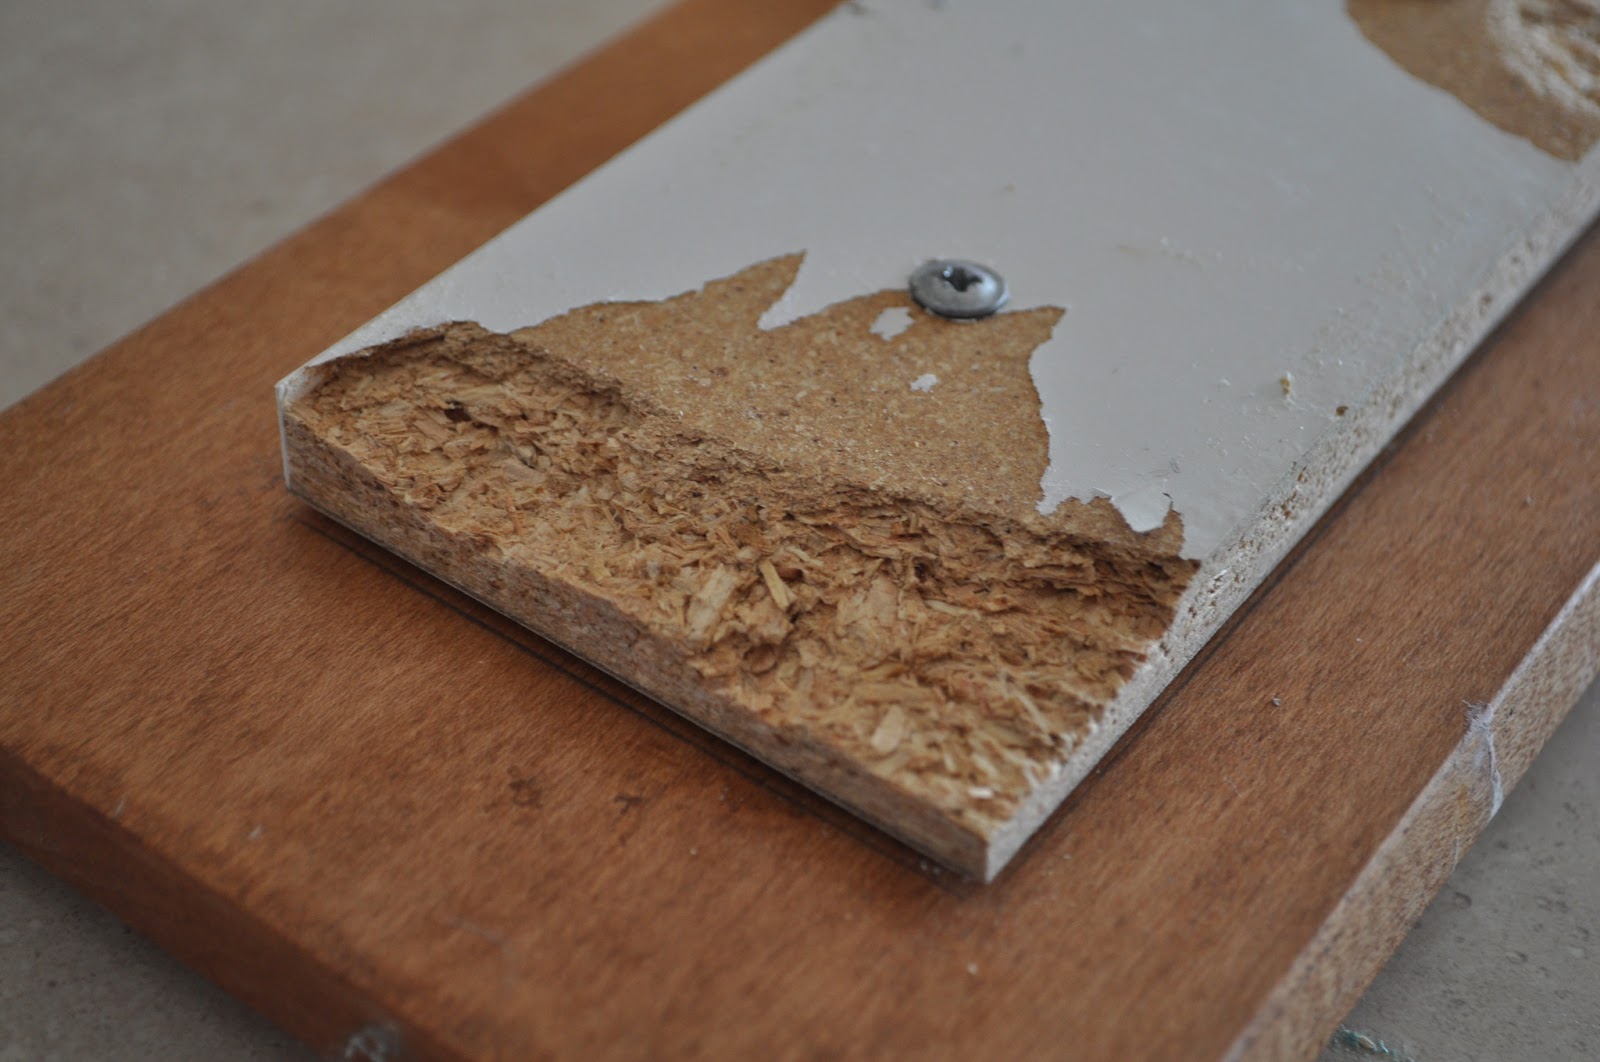
 Is something missing in this picture?
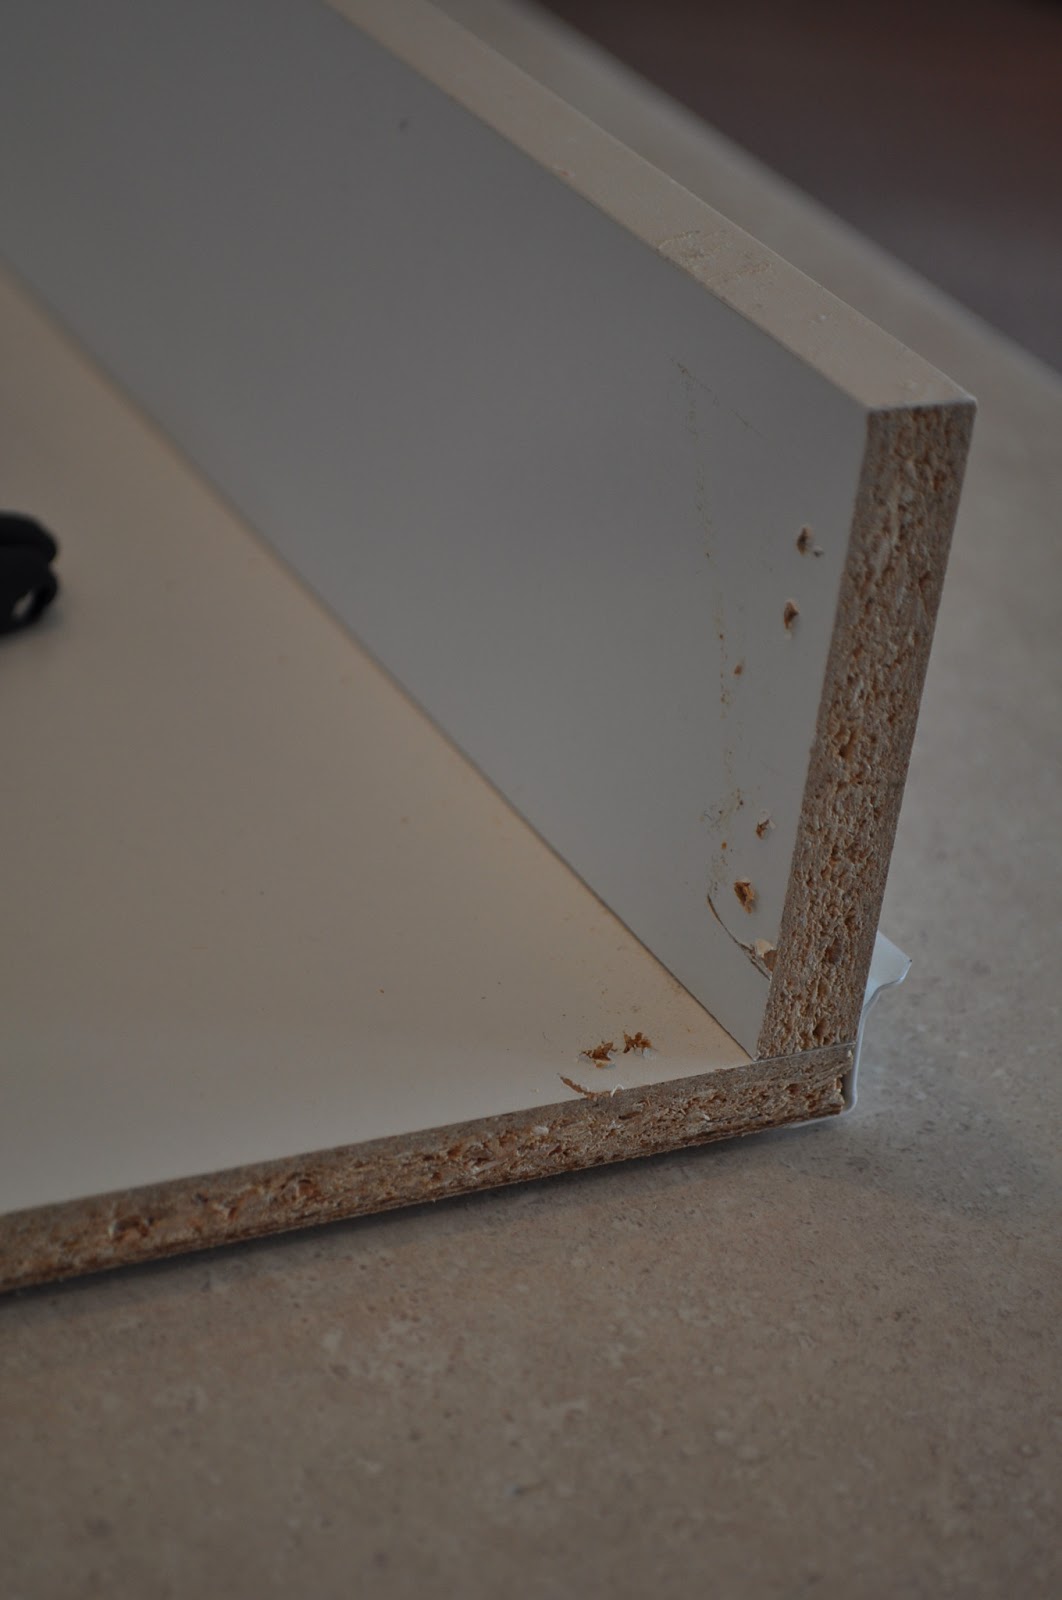
 Perhaps, a drawer face?  We have five kids.  And five kids equates to messes and destruction around every corner.  The kids are always using the drawers as a ladder to climb on top of the counter, and it was only a matter of time before one of the faces broke off.  But when it broke and I looked at it, I was really shocked to find just how shotty a job they did building the dang things.  The entire box of the drawer is just stapled together, and badly at that.  There's not a bit of glue or screws on ANYTHING except what attaches the face to the box.  I always knew the boxes were made of particle board, but I didn't ever pay attention to how cheaply they are put together.  So it's no wonder the thing finally broke off.  Now I'm waiting for more drawers to start breaking.

 You can see where it had been stapled in because when it broke, it literally ripped apart from the staples.  Quality!
 Before I removed the backing, I carefully traced exactly where the backing sat.  Very important step!  And just look at how gross the back of the face was.  Ew.
One of the hardest parts of this job was removing the staples from the box.  This was really difficult because when the face ripped off, the staples bent.  And the staples were in there very tightly, and they were very hard.  It took me about an hour to remove everything, but a couple pieces remained.  I had to work around what I couldn't remove.

Because I was going to the trouble to fix it, I was NOT going to replace the back with particle or MDF board.  I used good, solid lumber.  But the problem what that the backing was exactly 3 inches tall, which is NOT a standard size of anything.  Even a 1x3 isn't really one by three inches.  It's actually more like 3/4 inches by 2 1/2 inches.  So I first cut a 1x4 to an EXACT measurement to fit the space.  I kept the old, broken backing and used to to go by.  You have to be careful to cut it exactly because it needs to fit in there like a glove.

 I then used a jig saw to "rip" the board all the way across to make it flat with the top of the box.
I Gorilla Glued the sides and bottom to the box, where the staples used to be.  Gorilla Glue is amazing stuff, but you have to be very careful to follow the instructions and WEAR GLOVES!!  It cures with moisture so you first have to lightly dampen both surfaces that you are gluing together.  After it was glued, I secured it all together so it would dry nicely and tightly.  Kept it secure for at least two hours.

The next day I used some wood screws to add support into the new joint of the box.  I did two 1 1/4 inch screws on each side, none on the bottom because it didn't need it.
Remember how I traced where the original backing had fit?  I lined the box up perfectly on the of the traced face back.
I find where the original screw holes where.  On this drawer, there were three of them.  Because I didn't want to overlap holes (it would take away from the strength)I  marked on the new lumber a line to indicate where the old screws were so I DIDN'T duplicate the holes in the same place.
Now, I fit the box on top of the face back perfectly.  Good thing I traced it!  I secured it with a little masking tape so it wouldn't shift while you drill it.
 Drill the holes as centered as you can, obviously avoiding the old holes.
I again used a 1 1/4 inch screw, which is slightly longer than the original screw because the lumber is thicker than the old board.

Ta da!  Since I was already working with my power tools, I went ahead and added some hardware to the drawers and cabinets (something I've been wanting to do for years).  Now when we have people over I don't have to duck tape the drawer facing from the inside, just to make it look normal.  I'll post later about the perfect way to install hardware like this.

Wednesday, January 2, 2013

How To Save Your Carpet From Pee & Vomit

There are a few things that I can't help buying when I'm at the grocery store.  No matter what, I always end up buying sour cream, cream cheese, and cream of chicken soup.  Lately I have added baking soda to my list of staples.  Why?  Oh, why NOT!!  I have now potty trained four children and our poor carpet has taken such a beating as a result.  But it wasn't until a few months ago that a friend of mine turned me on to a different way of dealing with peed on carpets and rugs.

On Saturday we had a little accident on our practically brand new carpet in the basement family room.  My friend's 2 year old just couldn't hold it so we found a puddle on the floor.  The old me would have panicked because it's NEW and EXPENSIVE carpet.  But the new and educated me didn't mind at all.  The old me would have ran for a bottle of Resolve and some wet rags.  But the new me just sent Cody upstairs for a box of baking soda.


You see, carpet has a few enemies, and one of the biggest enemies is water.  Seems pretty harmless, right?  Water is a killer of carpet pads and carpet fibers.  The second killer of carpet is soap.  Any kind of shampoo cleaner leaves a nasty residue on the carpet which over time, attracts more and more grime.  

So in the case of peed on carpet (which let's face it....it's gonna happen with small children in the house!) the very best thing to do is find the area as QUICKLY as you can, and pour a lot of baking soda on it, straight from the box.  The properties of baking soda are simply amazing.  In this case it acts as a sponge and an odor neutralizer.  After you pour it on, within seconds you can see it becoming soaked with liquid.  And in the case of urine, light yellow liquid.  It can't help but absorb every bit of moisture within it's reach.  I don't believe that any carpet cleaner or steamer could do the same job as good old fashioned baking soda. 
It's the easiest fix.  Leave it on for at least 24 hours, and then vacuum away.  Because the soda is so fine, you will want to do a very thorough job of vacuuming.  Make sure you get all the pee soaked (and now dried) particles of baking soda up.  And then comes the fun and kind of gross part.  Stick your nose all the way into the carpet and take a deep breath.  What do you smell?  You should smell NOTHING.  And the great part is that it's not a superficial fix.  There will be NOTHING left behind.  You see the above picture?  Two days ago there was a sloshy puddle off tinkle on that area.  Now you can't even see an outline of where it used to be, because there is nothing left behind!

The same exact concept can be used for vomit on carpets and upholstery.  The difference is that vomit usually carries some sort of virus or bacteria, whereas urine is sterile.  Smells and looks nasty, but you can actually drink the stuff.  Puke, on the other hand....it's just gross and will make you sick.  If a child throws up on an area, clean away as much as you can with rags and a little bit of Resolve.  Sometimes there's just no way around using shampoo on carpet.  But after it's as clean as you can get it, throw a box of baking soda on it and let it sit for a day or two.

A few months ago Garrett had a stomach bug and threw up for a week.  And that boy, for whatever reason, has the most sour smelling vomit!  The smell stays on anything is touches, even after being washed on hot two times.  He threw up all over our carpet upstairs and for the life of me, I could NOT get the smell out.  One day I bought some new pillows for our bed and somehow they got dragged out to the floor and they were sitting on the spot where it smelled so bad.  An guess what?  Those pillows ended up in the garbage because they never smelled good again!  

And that's about the time that my friend told me about the baking soda method.  Even though the vomit had long been cleaned up and the carpet was dry, the smell still remained so I doused the whole area with three boxes of soda.  Two days later, there wasn't a hint of the smell anywhere! 
Oh, and I should add that this applies to mattresses as well!  This afternoon Devin napped on our bed and had an accident.  Luckily I caught it as soon as he did it.  Ha ha, this actually happened right after I got through vacuuming the pee spot on the downstairs carpet from this weekend, thus being the inspiration for this delightful post.  So I stripped the bed and threw a bunch of soda onto our $1,300 mattress.  And I'm not even worried about it!  

And there's what I have to say about baking soda.  It's on my favorite household items list! 
So inexpensive, so easy, and so affective!

Sunday, December 30, 2012

Potato & Ham Chowder


I said I was going to start posting again, and looky here! That's just what I'm doing!  It's been almost a week since our Christmas Eve feast, and my fridge is still loaded with leftovers.  And like every year, there's a large Tupperware container of leftover ham.  What do YOU do with all that leftover ham?  Well I turn a large part of mine into an amazing chowder.  If you have potatoes, celery, onion, carrots, butter, and ham, you probably have everything you need stocked in your kitchen!

Potato & Ham Chowder

9-10 cups potatoes cut into 1 inch cubes (I peel half of them and leave half the peels on)
1 cup chopped celery, including leaves
1 cup chopped onion
1 cup chopped carrots
2 cups cubed ham
9 cups water
8 chicken broth cubes
1/2 or 1 tsp salt, depending on taste
1/2 tsp black pepper
1 stick butter
3/4 cup flour
4 cups milk

Boil together everything EXCEPT flour and milk, then let simmer for about an hour.

Take a potato masher and mash up everything in the soup until the potatoes are in partial pieces and the liquid looks really murky. (make sure you wear an oven mit!)

In a blender, blend together the flour and milk until the lumps are gone.

While the soup is simmering and very hot, slowly pour the milk mixture into it while stirring the entire time.  Continue to simmer and let it thicken.

Serve with a little bit of grated cheese and green onion on top.  Can't beat it on a 20 degree day!

Thursday, December 27, 2012

Hey There, Old Friend!

Remember me?  Yup, I used to post here.  And then life with five kids got insanely busy and it just went to pot.  So maybe now that life is a little less chaotic (HA!!) I will start documenting my projects again.  I got some new tools for Christmas and I have a garage full of lumber and supplies and it's just BEGGING me to come and play. 

Wednesday, June 22, 2011

Two New Creations

I have to apologize to my whopping eleven readers for being absent for three months now. I have been extremely busy working on something. His name is Garrett. Can you believe I made this adorable guy? He became a finished product on April 3rd. Wow, five kids has been a real trip. But it's been a fun trip.

And I finally finished the picnic table I've been wanting to build the kids for months now. Life seemed to prevent it (understandably so) but I finally found the time to do it. And I'm happy to say that my dining room floor has stayed remarkably clean as of late because my kids have insisted on eating all of their meals out on their new table. I need to take a picture of them all sitting around it. One of these days. It fits six children perfectly, from my seven year old down to my twenty month old. I love how it turned out! It is sanded and ready for a finish of some sort. I'm debating between an apple red enamel or a natural looking wood stain. Either one will be weather resistant of course. Decisions decisions! My good friend pointed out that it looks just like something she saw in a Pottery Barn catalog once. And I know the exact one she is thinking of. It too was candy apple red and it cost $350. Yikes!

I've had people ask me about this little table and if they can get one. Of course! I will make one for you at a price of $100. It will only be for local pick up (Salt Lake City area) so if you are interested, let me know. I will also do any finish you want for an extra $25, or you can get it sanded and naked and finish ready at no additional cost. I can also cut a hole in the center of the middle plank for an umbrella. The dimensions are 48" long and 38" wide. Contact me vnandrew555@yahoo.com


Wednesday, March 2, 2011

Homemade Wall Shelf

We have an awkward sized wall in our dining area, and for the five and half years we have lived here, I have not been crazy about what's been on it. I've tried out a few different things, but it always seems to look too cluttered or too bare. I've wanted a simple shelf along that wall, hanging high enough so heads don't hit it, but low enough to be able to display things. But as my problem always is, our studs don't ever line up to anything I like, AND everything I find is either too expensive or just not the right size.

So what did I do? I decided to make something of course. All I did was get a 1x8 pine board and two pre-holed brackets in a style that I liked. The best part? The board was only $8 and the brackets were $1.98 a piece. I picked them up at Home Depot and you can find them in the lumber dept. But after looking at it, it looked a little too plain. So picked up a long piece of trim that I liked. I like this leaf pattern because it goes along with a lot of stuff in our house (and it cost about $5 for the whole piece).

I cut the board to the length I wanted, and it's somewhere around 4 feet long. Can't quite remember. I sanded it down very well, and the glued on the trim (making certain it was all cut to size to fit the three sides) and then used finishing nails to nail it in place. Then I spray painted the trimmed and molded board and the brackets in Rustoleum colonial red. Then I added just a hint of glaze to make the detail on the trim pop out.

I was lucky enough to find studs in the wall that were "almost" centered to hang my brackets on. This part was a little tricky, as is getting anything centered and LEVELED on a wall. If it's not level, it looks horrible. So first I hung the brackets, then I put some wood glue on top, placed the board exactly where it needed to be, let it dry, took the whole thing off the wall (being extremely careful because it wasn't quite sturdy and I didn't want the newly dried brackets to snap off). Then I nailed the brackets securely into the board while the whole thing was on the floor. I didn't want to be nailing the pieces together while it was delicately hanging on the wall.

Now that it's all glued and nailed together, it's very sturdy. It is just the right size for that wall and for what I wanted to display on it. Do you like the "LUCKY" blocks? I made those a few years ago and they were super simple. It's just pieces of 2x4s, green paint, and white lettering. I am pleased with how the ensemble turned out!


Thursday, February 24, 2011

Basement Plans

We have lived in our house for 5 1/2 years. We had this house built which was a first for us, and like everything you do for the first time, you learn from your mistakes. One big mistake we made was not having the builder finish the basement for us. We tried to save money and figured "Oh, we can do it for much cheaper than the builder will charge!" Ha. Big mistake. Because we have lived with only a 2/3 finished house now for half a decade and it's been a challenge.

With a new baby on our heels, we have felt intense pressure to get this project underway. I am thrilled to say that we now have a CAD drawing (thanks to my incredibly talented engineer father) so we know exactly what we are looking at. We have spent hundreds of hours down in that basement, dreaming and scheming over the years, of what we would like it to become one day. "Oh, wouldn't it be nice if one day we..." Now that day is here!

We have framing scheduled for about ten days from now and I couldn't be more excited. Who would have thought the idea of having hundreds of pounds of lumber delivered into our driveway would thrill me so? Friday after next can not get here fast enough. After the framing, we are having all of the electrical done. Then the city comes out to inspect it, then we will possibly have it re-insulated. Then the first thing to be fully finished is Ethan's bedroom. Our sleeping situation in our current three bedrooms is interesting, and poor Ethan has been dying for his own room for months now. Or mabye even years now. I have so many fun decorating ideas for his bedroom and I can't wait until we are to that point!

After Ethan's bedroom is completely finished we will do the family room, which will also be fun. We are making a cove in the wall which will house our television with built in shelves below it. But my favorite part about this room will be the large walk-in storage closet and neighboring work station. The work station will consist of a large built in desk with cabinets below, and shelves all the way to the ceiling. It will be a great place for the family computer and for kids to work on projects. Then on the other side of the bathroom door will be a floor to ceiling built in bookcase. We will also be replacing the current sliding exterior doors (upstairs as well) with nice French doors.

The bathroom and the laundry room will be the last things finished, probably within a few months of finishing everything else. Since it is still very livable being unfinsihed, we don't feel the same urgency to get them done. Ethan can hoof it upstairs to use the bathroom and shower when he needs to.

Stay tuned for fun things we are doing to our basement! It's going to be quite the adventure!

Tuesday, February 22, 2011

Valentine Shelf Sitters

I know Valentine's Day was a week ago, but I am just now getting a chance to document a couple little things I made for the holiday. I always have 2x4s or scraps of 2x4s sitting in my garage, and I love to find uses for them. I made a couple of shelf sitters and I only used what I had on hand. Scrapbook paper, a little paint, distressing tools, Mod Podge, and ribbon. Notice I did NOT mention vinyl. Do I have a vinyl cutting machine? I wish. It's on my long list of things I'd like to have. Maybe for my birthday I will splurge a little and buy something like that for myself!
Doing faux vinyl on something like this is super easy, and when it's all done, you can't tell the difference. I simply fed my paper into my laser printer and printed off the words. If you have ample ink in your cartridges, it seriously looks just like vinyl letters. When you go to Mod Podge the paper onto the wood, brush all around the lettering and then at the very end give a quick swipe over the entire word surface, just to make sure it has the same sheen as the rest of it. If it gets too wet or you brush it too much, the ink can streak just a tad. But still, it takes quite a bit of glue application to even make it streak in the slightest.
I made a set of these "LOVE" blocks for each sister I visit teach from church. I love that this project didn't cost me anything! Go out and buy yourself a couple of 2x4s because they are very cheap (about $3 for 8 feet) and they are great to have on hand for when you get the crafting bug!


Monday, February 14, 2011

Tea Party Chairs- Complete!

Another project completed! Still a ton to do before the end of March when I officially need to be off my feet in preparation for this baby's debut. These chairs were extremely easy to do. I made the first one from start to finish before I even began the second one. When building something I have never done before, I always like to make one "prototype" in case I make a mistake or don't like a part of the plans. But there wasn't anything I would change about these plans. You can check them out here.

They are said to be "$4 chairs", but builder beware. I did only spend about $3.85 on lumber. But then I added in three cans of spray paint at about $4 a piece and about $8 in screws. Plus there is the wood glue, but I already had that on hand. For paint I used Rustoleum Sweet Pea satin (about 1 1/2 cans) and Rustoleum French Lilac satin (about half a can for the seat slats). I also used all 1 1/2 inch #6 Philps head screws, about 40 for each chair.

I built the entire chair base and painted it before adding in the seat slats. Since I wanted them in different colors, I painted them seperately. And it worked out great since the slats are the very last thing to go on. I distressed the slats and had every intention of distressing the pink on the chairs, but I am tired and worn out and SICK of sanding. Maybe one of these days I will distress them further, but for now I am happy with them.
The girls were very excited to see them completed last night! Today they wanted to have a Valentine's tea party lunch with their "new" table and chairs. I am very pleased with how the set turned out!


Sunday, February 13, 2011

Kid Sized Ballet Barre

My little ballerinas have been getting ready for their upcoming recital next month. The other day Hailey was practicing in the living room but kept losing her balance during one of the moves. In frustration, she said "Mom, it's not fair that I keep falling! I never fall in ballet class!" I told her it was because they used a barre in class to keep balance.

And then it hit me. My friend Alicia made a simple ballet barre as a gift for her niece. I remembered seeing it once and when I looked at the picture again, my mind imediately started modifying and building it. Thanks, Alicia, for giving me the inspiration!

I had several 2x4s in my garage, along with some scrap pieces of 1x2s and plenty of screws. All I needed was a rod, so after a quick trip to Ace and forking over $5.99, I had everything I needed to make my girls their very own ballet barre. The design is very simple, but I learned a few things as I went and after some tweaking, this is what I came up with. I still need to sand and paint it. I have the perfect color of off white paint that I'm going to use to keep it nice and feminine.
I used 2 1/2 inch #8 Philips screws for everything except drilling the 1x2 braces into the side beams. I started by drilling the bottom 51" piece into the side beams (27" pieces). Then I drilled the rod into the top using a single screw on each end.
Next I drilled the 24" base beams onto the 51" cross beam. I thought I was done, but nope! Upon flipping it back over, I found that it was very wobbly. So I then used two more 12" 2x4s to make the braces on the bottom beam. I thought I was done. Nope! Still wobbly from front to back.
So I grabbed some scrap 1x2s and made four more 12" mitered braces for the front and back. Aaaaahhh, perfect! It may not be the most aesthetically pleasing design because of all the braces, but I didn't want it to get twisted and broken when a kid decides to hang from it, rather than use it for what it should be used for.

When it's painted, it's going to look great. I tried to get a picture of both girls in front of it to show that it's the perfect size for two small children, but alas. Lauren wouldn't stop playing outside to come in for a picture. Hailey has already informed me that she wants a "dark purple" stereo for their room so she can play her own ballet music while practicing (don't know where I'll find a stereo in THAT color...) They are quite the little divas!

Monday, February 7, 2011

Valentine Ice Cream Pie


We had a yummy and VERY easy treat for family home evening tonight (for FHE the kids made valentines for the classmates). Not a whole lot to it and this is all you'll need for this variety-

1 graham cracker pie crust

3 cups softened vanilla ice cream

2-3 Tbsp strawberry lemonade powder (depending on how strong you like it)

1/3 C cold water

2 cups Cool Whip

sprinkles

Disolve the drink mix and water together. Add in the icre cream and beat with an electric mixer until just blended. Stir in the Cool Whip by hand, then pour it into the pie crust. Put a few sprinkles on top and then freeze for about an hour. This was really yummy and PINK! I should have added a little bit of red food coloring for that extra something. You can do this with anything...I think for St. Patty's day I will use an Oreo pie crust and mint chocolate chip ice cream instead, with a little more green coloring in it. You should try it!

Sunday, February 6, 2011

Tea Party Table Complete!

One more thing marked off my list! I am so happy with how the table turned out. The top was completely beaten up, but it was very salvagable and I couldn't deny what good shape the structure of the table was in. You can see what it used to look like here. Still can't believe this beauty was only $5.
I sanded it a lot, mainly on the top and the apron sides. The aprons were already distressed looking, but that is the look I was going for anyway. I still sanded the apron sides, but left quite a bit of the "cracked" look. Then I primed the whole thing (I used spray on the legs because I didn't want it to drip and look streaky on those ridges.) Then I used "heirloom white" spray paint from Rustoleum. After it dried completely, I distressed it quite a bit, then glazed it with Ralph Lauren's "manchester brown" (which is the same glaze I used on my six foot wall ledges). Obviously I was wanting the table to look antiqued and I think I accomplished that.


I left some of the cracking on the surface as well, and the glaze filled right in those cracks adding to the distressed look. Too bad you can't see the detail very well in these pictures.
The girls were very excited about it! Now if I can just find some time this week to finish their chairs. When I finish them, I will use the same technique with the distressing and the glazing. They are going to be light pink and lavender in parts. Talk about girly!